• Wax injection machine is of proper size and in good operating condition; all controls such as temperature, injection pressure and flow controls are calibrated (or verified) properly and within calibration time requirements.
• Wax temperature has the greatest influence on wax injection pattern quality so maintaining rigorous controls are critical. Temperature has a great effect on wax viscosity, a measure of flow.
• For temperature measuring devices, the calibration techniques should include the use of boiling and freezing water as calibration points for comparison to calibrated standards.
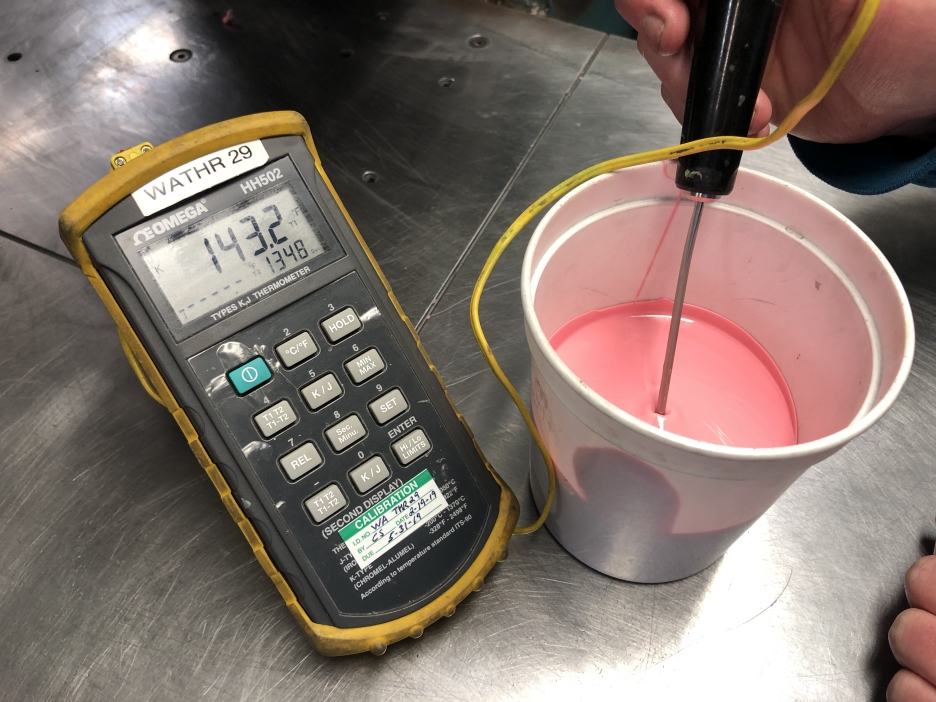
• Wax temperature at the nozzle should be confirmed using a controlled volume, like a quart cup, and measure the temperature. See example 1 below.

Example 1
Wax temperature measurement at the nozzle tip. First purge the wax in the nozzle then fill at least ½ the volume of a quart cup container. Immediately insert a small tip temperature measuring device that have been calibrated and allow to reach the maximum temperature.
• Pressure calibration should be performed by comparison to a certified gauge (see example 2). These gauges can be employed by connecting to a manufacturer supplied calibration point. Calibration points should be close to component being calibrated.

Example 2
A certified gauge can be acquired from industrial suppliers or gauge manufacturers. These are typically oil-filled and chosen knowing the pressure typically measured and assuring the gauge reads this pressure near the mid-point of its display.
• Timers are verified as operating correctly. Verification is performed by operation in a wide range of time periods with comparison to a known working standard. If there is a question, consult equipment supplier.
• Wax conditioners should maintain temperature at the manufacturer’s recommended set point for the reserve tank. Review owner’s manual for tolerance of your machine.
• Wax die runner diameters are designed to ensure proper wax feeding during the injection cycle, including the dwell cycle (while under pressure) after the fill of the die cavity is complete.
• Wax is in proper condition and suitable for the application. If there is a question, consult wax supplier.
• Environment is suitable for wax pattern manufacturing, i.e. proper cleanliness, temperature and humidity.
• Ensure the die cavity is clean, and no metal tools are used for pattern removal.
• For issues related to non-fill, flow/knit lines, and air bubbles, it is recommended to use an interrupted injection cycle (or short shot) to examine how the wax enters the cavity. Begin by a start-stop cycle at 1 second, opening the die to examine the order and direction of filling the runner and cavity. Wax temperature has a major effect on the ability to fill the die cavity without defects. This method of analysis can also assist in determining a proper location of air vents by revealing the last area to fill.

• Clamping force refers to the force applied to a die by the clamping unit of a wax injection machine. In order to keep the die closed, this force must oppose and exceed the separating force, caused by the injection pressure of the liquid wax into the die by the press. Clamp pressure required is a simple calculation using the surface square inches of the cavity and runner open along the parting line of the die. This square inch value multiplied by the maximum expected wax injection pressure (lbs./in2) creates the pounds of downward force necessary to avoid separation of the die halves. Review the equipment manual to understand how the gauge reading correlates into the downward force. It is recommended to use an additional 10% minimum excess downward force.
Example:
1. Determine the total surface area of cavity at the part line.
2. Multiply pressure x surface area to determine force. Force = Press x Area
a. Add approx. 10% to the force.
3. For a cavity 6 x 4 in = 24 sq. in. X 200 psi = 4800 lbf x 1.1 = 5280 lbs. of force is required to contain the wax when injecting at 200 psi.
For a given injection press, how do you know what the force is for the PSI gauge reading?
1. Determine the clamp cylinder size. Bore/diameter is 6” for a 37 Ton machine.
2. Cylinder Size = 6” bore (surface area = 28.27 square inches)
Force = Press x Area
1 PSI on machine gauge = 28.27 lbs. force
Therefore 5280 lbs. / 28.27 lbs. /psi = 187 psi on the machine gauge


